Does a golf hole have personality? Our front nine certainly does, according to General Manager Jeff Bruce…
Hole 1 – The Joker
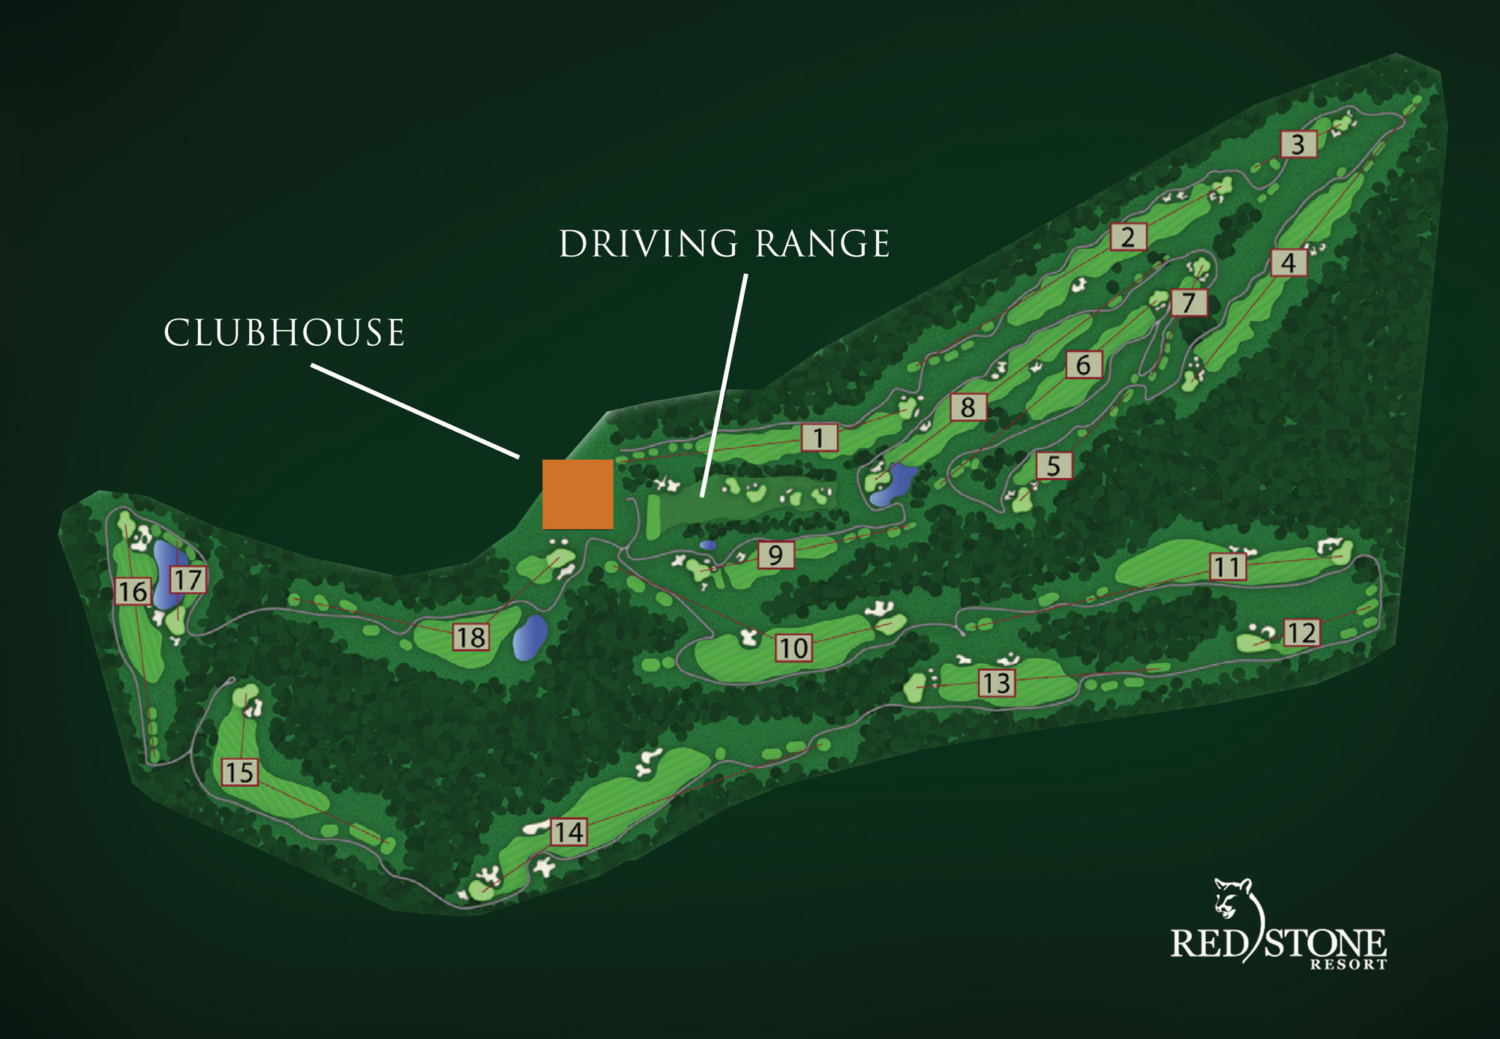
If golf holes had personality, hole 1 at Redstone would definitely be called The Joker. Shots from all the tee boxes are beautiful but from the black tee box, true beauty is revealed. By teeing up from the tips, you can see Les Furber’s signatures right away. The fairway is as wide as a football field with a berm running down the left side to protect you off the tee, but there is danger all down the right side, with bunkers and OB parallel to the range. Once you have a view to the green, The Joker lulls you in with a gentle slope on the left side to help cradle the ball to the green with deep bunkers on the right. Therefore, like most Furber courses, pick a side and stick with it to minimize the danger while having fun watching your friends struggle on the wrong side of the fairway. A classic ‘Doing it right on the wrong side of town’ golf hole.
Hole 2 – “Easiest par 5 in the Kootenays” – a distinguished Redstone member
This par 5 plays 438 yards from the white tees, which will give shorter hitters off the tee box an excellent chance to score. Hole 2 has a runway feel with a generous fairway to hit off the tee, along with right side bunkers that seem to be a magnet for attracting balls. It is important to remember when approaching this split-level green that the approach shot plays half to a full club shorter because of the elevation change, with white sand bunkers behind the green catching aggressive golfers hitting full clubs from the fairway. Be cautious when approaching this green — anything to the right will leave you with a difficult slope to hit up the green. “Easiest par 5 in the Kootenays” is true if you hit three good shots, otherwise this quickly becomes an easy double bogey hole (in the Kootenays).
Hole 3 – Short and Sweet
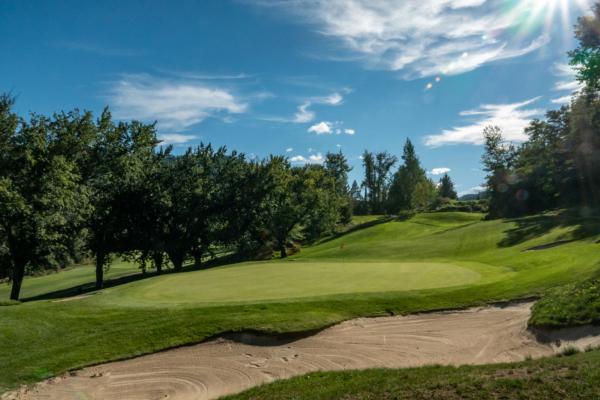
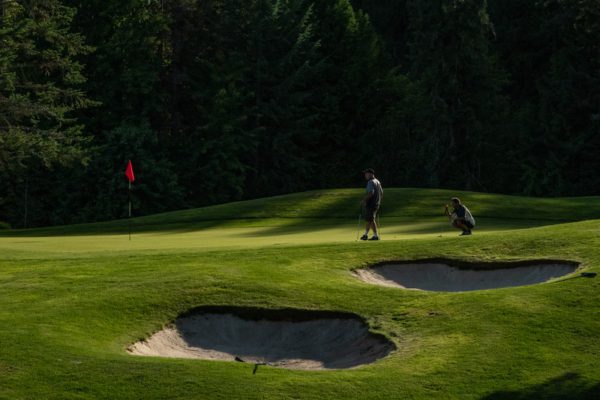
(Pictured – The third hole)
This one is short and sweet, even for a par 3. Hole 3 from the red tees gives a short wedge down to a receptive green with gentle undulations, giving the ball a soft landing. By using a wedge or high iron, the ball will gently land on this green located 87.4 feet below the tee box and 156.9 feet below the white tee box. The danger for this hole lies again on the right side, where an errant tee shot will have your ball settle close to hole 4’s tee box. Off the tee, keep in mind that the bunkers left of the green can help you or hurt you, depending on your skill level; however, with some of the bunkers having a gentle lip, a putter may be used to salvage a missed tee shot. If you hit your tee shot a little thin, the bunkers off the back of the green will protect you, keeping your ball from going on an unexpected vacation to hole 4.
Hole 4 – The Beast
Welcome to the hardest hole at Redstone. Hole 4 is The Beast: a long par 5 that offers a narrow tee shot, with a second shot that will have you laying up or going for the gusto — but you better be long and straight on that second shot if you’re going for eagle. This hole has very little margin for error. When playing hole 4 from the white tees, it’s best to attempt a tee shot just over the hill with a layup to the hitting area in front of the numerous greenside bunkers. The third shot up to the green has most putts breaking towards the creek, so having an uphill putt is recommended. This hole will give the beginner-to-expert golfer a great opportunity to take a big number on the scorecard; therefore, treating it with the respect you’d give a grizzly will make your round of golf much more enjoyable.
Hole 5 – Majesty in the Sunlight
Finally, a par 3; a tee shot with all carry is needed to hit this overly generous green with bunkers protecting against short shots or shots to the right of the green. To play this hole to perfection, you must be very conscious of where the pin is, otherwise a three or four-putt will come into play. This green gets lots of sunlight, so being above the hole putting towards the gully is usually very fast. Hole 5 takes confident iron shots from all tees to a green that is fast and fair. Have fun hitting a high cloud-touching iron shot to a fast green surrounded by white sand bunkers. Hole 5 is a majestic par 3 that will either make you pull your hair out or dance for joy.
Hole 6 – Tricky Subtle Breaks
Hole 6 is a short but challenging par 4 with a generous landing zone from the tee box. To play this par 4, it’s best to aim for the 150-yard marker in the middle of the fairway. The landing zone is one of the flattest second shots on the golf course. Hitting the second shot from the middle of the fairway is a premium because of the large creeping willow trees on the left side, and the large trees on the right that will block your shot onto a smaller, bunker-protected green further up on the front right side. Your second shot will hit into an upslope, minimizing the roll of the ball once it hits the green. The tricky section of hole 6 lies there on the green, which has many subtle breaks that slope from back to front. Be sure to have fun and go pin hunting to maximize your scoring on this beautiful par 4.
Hole 7 – Rock Wall Friend or Foe
Hole 7 is a short par 3 with danger to the right of the green and forgiveness in front, but only if you decide to hit a shorter shot. Hole 7 has a bit of a false front to the green, which gets extremely fast in the summer months. The left side of the green is protected by a natural rock wall, which can help you if you’re lucky, but sometimes it’ll bite you, giving you a very difficult shot if you hug the wall too closely. On the back left of the green is a very generous bunker with a short lip, so getting the ball on the green from the bunker will still give you a chance to save par. The bunkers on the right side of the green will be your friends and save the ball from rolling down to hole 4. Have fun when playing this par 3 — going for the pin will always leave you with an easier shot at birdie or par.
Hole 8 – Long Bomber’s Dream
Hole 8 is a beautiful par 5 to grip it and rip it. This hole has fairway bunkers guarding the tree line from an errant tee shot. Hole 8 is a long bomber’s dream; the fairway is wider than most football fields with a down slope at the 280-yard mark that helps you out if you’re really hitting bombs. When getting aggressive on hole 8, remember to keep the ball to the right side of the fairway because of the magnificent pond, which contains a magnet to attract any balls in its immediate area. When putting on the green, it’s important to recognize that most putts break toward the pond, so play a little extra break for those longer putts.
Hole 9 – The Most Beautiful Tee Shot
According to our members, this is “The most beautiful tee shot around.” Hole 9 is a short par 4 to an elevated green, so a driver isn’t needed off the tee. Hitting the fairway in any spot will give you a great shot at par or birdie. When unleashing off the tee box, it’s very important to hit it straight because there is OB right and hazard left the entire way up the fairway. Hole 9 has a green that slopes toward the fairway, so this makes the second shot to green very receptive and gives you a big green light for pin hunting. After putting on this hole, we recommend hitting the clubhouse for a snack and a beverage to fuel up for the back 9 journey.
 (Pictured – The ninth hole)

